Jul 31, 2012

First Impressions

We all know that first impressions are pretty important, whether it's landing a new job, meeting that special someone, or having dinner guests over.  When we first moved to our current home, the inside needed so much work that I completely neglected the outside.  After a few months, I suppose I got used to its appearance and didn't give it much thought.


We've had quite a few guests over the past several months and will be having more in the future, and I suddenly became aware of how dingy the entrance to our home looked.  The door was a very pale color and showed every little smudge.  I had tried scrubbing it, but that didn't help much.  The brown carpet at the bottom of the steps seemed to collect all kinds of dirt and grime, and the walls were covered in cobwebs.  It was time for a makeover!


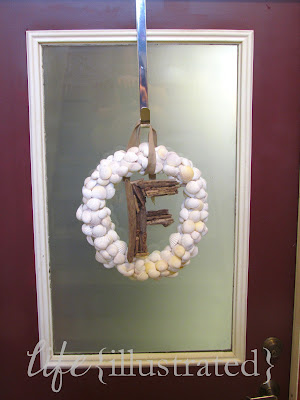
The entrance to our home is at the bottom of a stairwell in a garage, so livening it up was a bit of a challenge. All things considered, though, I think it's a vast improvement!  We painted the door the same color that we used in this post, painted the space above the door, made a sign to hang above the door, and laid brick over the ugly carpet in front of the door.  I finally finished my summer seashell wreath (I know, I know... it's almost August...), and the entryway is now complete!


This is the color behind the sign.  If you think you don't have time to take on a project like this, don't lose heart.  I painted the space above the door in between taking waffles off the waffle iron.  If I can do it, you can do it!

Seashell and driftwood wreath... tutorial is coming!


Marshall chiseled bricks to fit in the corner spaces.


Jul 30, 2012

A Little Zig for Your Zag

I finally finished my zig zag quilt!  It is a mix of a few different quilts I'd seen and some of my own ideas.  Honestly, it was a nightmare to line up all of those points (especially from the front to the back), but I'm pleased with the results!  This quilt is great for using up larger scraps and would also work really well with fat quarters.  I used the instructions on this tutorial to make the actual zig zags, and I made up the rest as I went.  If you want to see it in person, it will be hanging here for the next few months.


Jul 27, 2012

This Week {illustrated} and a Canning Storage Solution

It's just about time to start canning this summer's garden produce, and I've been working on organizing my little canned food storage area.  I hate having the canning rings all over the place, so I searched the internet to see if anyone had any great storage ideas.  I didn't really come up with anything.  My space is very limited, so I wanted to be able to hang my rings and save my shelf space for the jars.  And then it hit me...  Use hangers!  I grabbed a pant/suit hanger from the closet, bent the wire part back, and there you have it!


Here is the rest of our week in pictures:


We enjoyed some wonderful birthday food!  I'll be sharing the pancake and crepe recipes in the future.
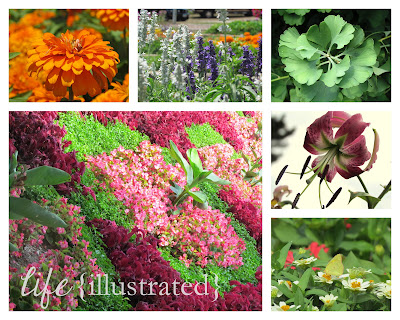
We visited an arboretum for my birthday, and they had the most gorgeous flowers!
I got about 5 inches of hair chopped off!
I finished this project last night!  More pictures to come...


Jul 26, 2012

Chip It!

My new favorite thing is Sherwin Williams' Chip It tool.  Have you used it yet?  It is super handy for finding paint colors and inspiration based on your own photos or images you find on the web.  Here are some pictures I've taken, uploaded to the internet, and "chipped."


It's almost as addicting as Pinterest...  Happy chipping!


Jul 25, 2012

SOLD... to the Lady with the Quilt Shop!


We sold our first piece of furniture today!  We are thrilled and hope to sell more in the future.  Marshall designed, built, primed, and painted this bench entirely by himself.  I'm really impressed with him!  His parents own the Ben Franklin store in Chariton, IA, and they plan to put the bench in their quilt shop.  Stop in to see it in person, and let us know what you think!


For those of you who are curious about which products we used, we love this primer (no sanding required!), and the paint was another mistinted can we picked up at Lowe's.


Before


Jul 24, 2012

What's for Dessert?


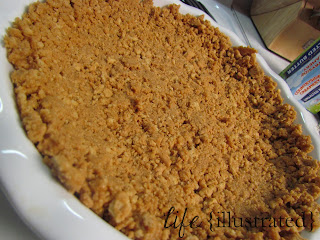
I LOVE Peanut Butter Pie, and it's usually my birthday dessert of choice.  It is sooooo yummy, creamy, and easy to make.  You can make or buy the traditional graham cracker crust, but I like to make a Nutter Butter crust.  Enjoy!

Crush 24 Nutter Butters in a bowl.
Melt 5 T of butter.
Add the melted butter to the Nutter Butter crumbs, and mix well.
Press the mixture into a 9 inch pie pan.
Beat 8 oz. of cream cheese and 3/4 C powdered sugar together.  Mix in 1/2 C peanut butter and 1/2 C milk.
Fold in 4 oz. of Cool Whip.
Pour the mixture into the crust.
If you are making this for a birthday, add your candles now.  They are hard to get in after the pie is frozen!  Cover and freeze until firm.
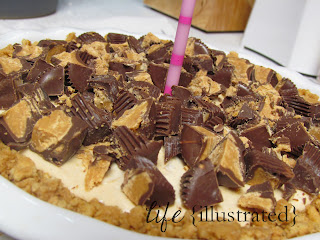
Take the pie out of the freezer 1-2 hours before serving.  Add chopped peanut butter cups to the top if desired.


EAT!
Click here for printable recipe.

Don't miss a thing- subscribe today!  It's FREE!  :)

Sharing at:

Jul 23, 2012

Happy Birthday to Me and a Gift for You!

It's my birthday, and I've made a little something for you.  I love to have framed Bible verses around the house, and I switch them out frequently.  These are made to fit in a 4 x 6 frame, as shown.  If you have any trouble downloading them, send me an e-mail (life.illustrated247[at]gmail[dot]com), and I'll send you the document directly.  Feel free to pin these or share them with your friends.  Better yet, tell your friends to subscribe to life {illustrated}!