Mar 29, 2013

How to Plan the Perfect Trip to Disney World, Part One: Myths Busted

As I mentioned in an earlier post, we are planning on taking a trip to Disney World. We are SO excited about it! As our friends and co-workers find out about our upcoming trip, we are discovering that a lot of people would like to go but have no clue how to plan for it. If you fall into that category, this post is for YOU!


We will have several parts to this series: common myths busted, how to plan financially, where to stay, and dining options. If you are planning a trip and would like to have another topic covered, please let us know. We want this series to make life a little easier for you, and we are very open to suggestions. We also realize that what is perfect for us may not be perfect for you.

First of all, you may be wondering what qualifies us to be writing this series in the first place. I have been to Disney World four times, all under different circumstances.

March 2003: I went as part of our high school music department trip over spring break. We rode in charter buses the whole way down and stayed in a hotel in Orlando. As this was a school trip, we stayed pretty busy with workshops, parades, etc., and we didn't have much time in the parks.

May 2008: I flew down with three girlfriends, and we stayed in the Pop Century Resort on Disney property. We stayed for five days. We did not purchase a dining plan, and we primarily ate food that we took with us (granola bars, Cheerios, etc.).

April 2009: Two of my cousins, our grandmother, and I flew down and stayed in the Pop Century Resort. We stayed for six days. We did not purchase a dining plan, but other than breakfast, we bought most of our food in the parks.

September 2010: My dad, sister, younger brother, and I flew down and stayed in the Port Orleans-French Quarter Resort. We stayed for four days, and the Magic Your Way Plus Dining Plan came free with our resort reservation.

This year, we will be staying in the Pop Century Resort for six days. We received a great discount on our resort reservation, and we used the savings to purchase the Magic Your Way Plus Dining Plan.

Even if none of those scenarios are fitting for your family trip, I think you'll still find some helpful tips in our series.

Without further adieu....

PART ONE: Myths Busted

Myth #1: "You're going to Disney World? I thought Disney was just for kids."

Wrong! I have never been to Disney World with children, and I've had a blast each time. Disney has made a huge effort to make their parks just as much fun for adults as they do for kids. What do they have that teens and adults will enjoy? For starters, each of the four theme parks has thrill rides (my favorites are Expedition Everest and Rock'n'Roller Coaster). Disney also has two water parks, Blizzard Beach and Typhoon Lagoon. At Typhoon Lagoon, you'll find a wave pool, water roller-coaster type ride, lazy river, snorkeling with sharks and tropical fish, and water slides. You can take in a round of golf at Disney's Oak Trail Golf Course. Marshall's a golfer, but I'm not, so we're looking forward to trying out both of the miniature golf courses instead. If you're looking for a more relaxing vacation, Disney has spa packages available. There are many fancy and upscale restaurants for the romantics to pick from, and I highly recommend an evening at The Boardwalk. The sports lover will find a lot to do at ESPN's Wide World of Sports Complex, and gamers will enjoy DisneyQuest, an indoor virtual reality theme park. Last, but not least, is Downtown Disney. Here you'll find lots of shopping and great places to eat. You don't have to have to pay to get in, so we like to visit Downtown Disney on the day we arrive in Florida rather than spending money on a park ticket for just a few hours.

Myth #2: "We'd love to go to Disney World, but we just can't afford it."

If we can afford it, you can afford it. We are a one income family, and like many of you, we live on a pretty tight budget. We decided about two years ago that we wanted to go, so we started saving all of the gift money we received and income from extra projects or overtime for our Disney fund. We are blessed with generous families and were given lots of overtime and extra little projects, and it really didn't take too long to save. In the grand scheme of things, two years is such a small amount of time to wait and save.

There are certain times of the year when Disney prices are lower, and if you have a flexible schedule, you can save a lot of money that way. We'll discuss that more in part two of the series.

Myth #3: Disney World = Magic Kingdom

Disney World is made up of four theme parks, and Magic Kingdom is just one of them. Magic Kingdom was the first park built and is the home of Cinderella's castle, but there is a lot more to Disney than that!

Magic Kingdom itself is a whole lot more than the castle. The park is broken up into different sections: Adventureland, Frontierland, Fantasyland, Tommorowland, Liberty Square, and Main Street, U.S.A. Each section has different rides, activities, and restaurants that are theme-based.


EPCOT is almost like two parks put together. The World Showcase Lagoon is half of the park. There are eleven countries represented: Canada, United Kingdom, France, Morocco, Japan, U.S.A., Italy, Germany, China, Norway, and Mexico. In each country's pavilion, you will find native food, educational displays/shows/rides, and shops with authentic souvenirs. One of my favorite parts is that the employees who work at the pavilions are actually from those countries.


The other half of EPCOT is called Future World. There are several fun rides and a lot of really cool displays here. If you enjoy science, I think you would love Future World!


Epcot also has an epic fireworks show every evening. It's a must see!

EPCOT during the Flower and Garden Show
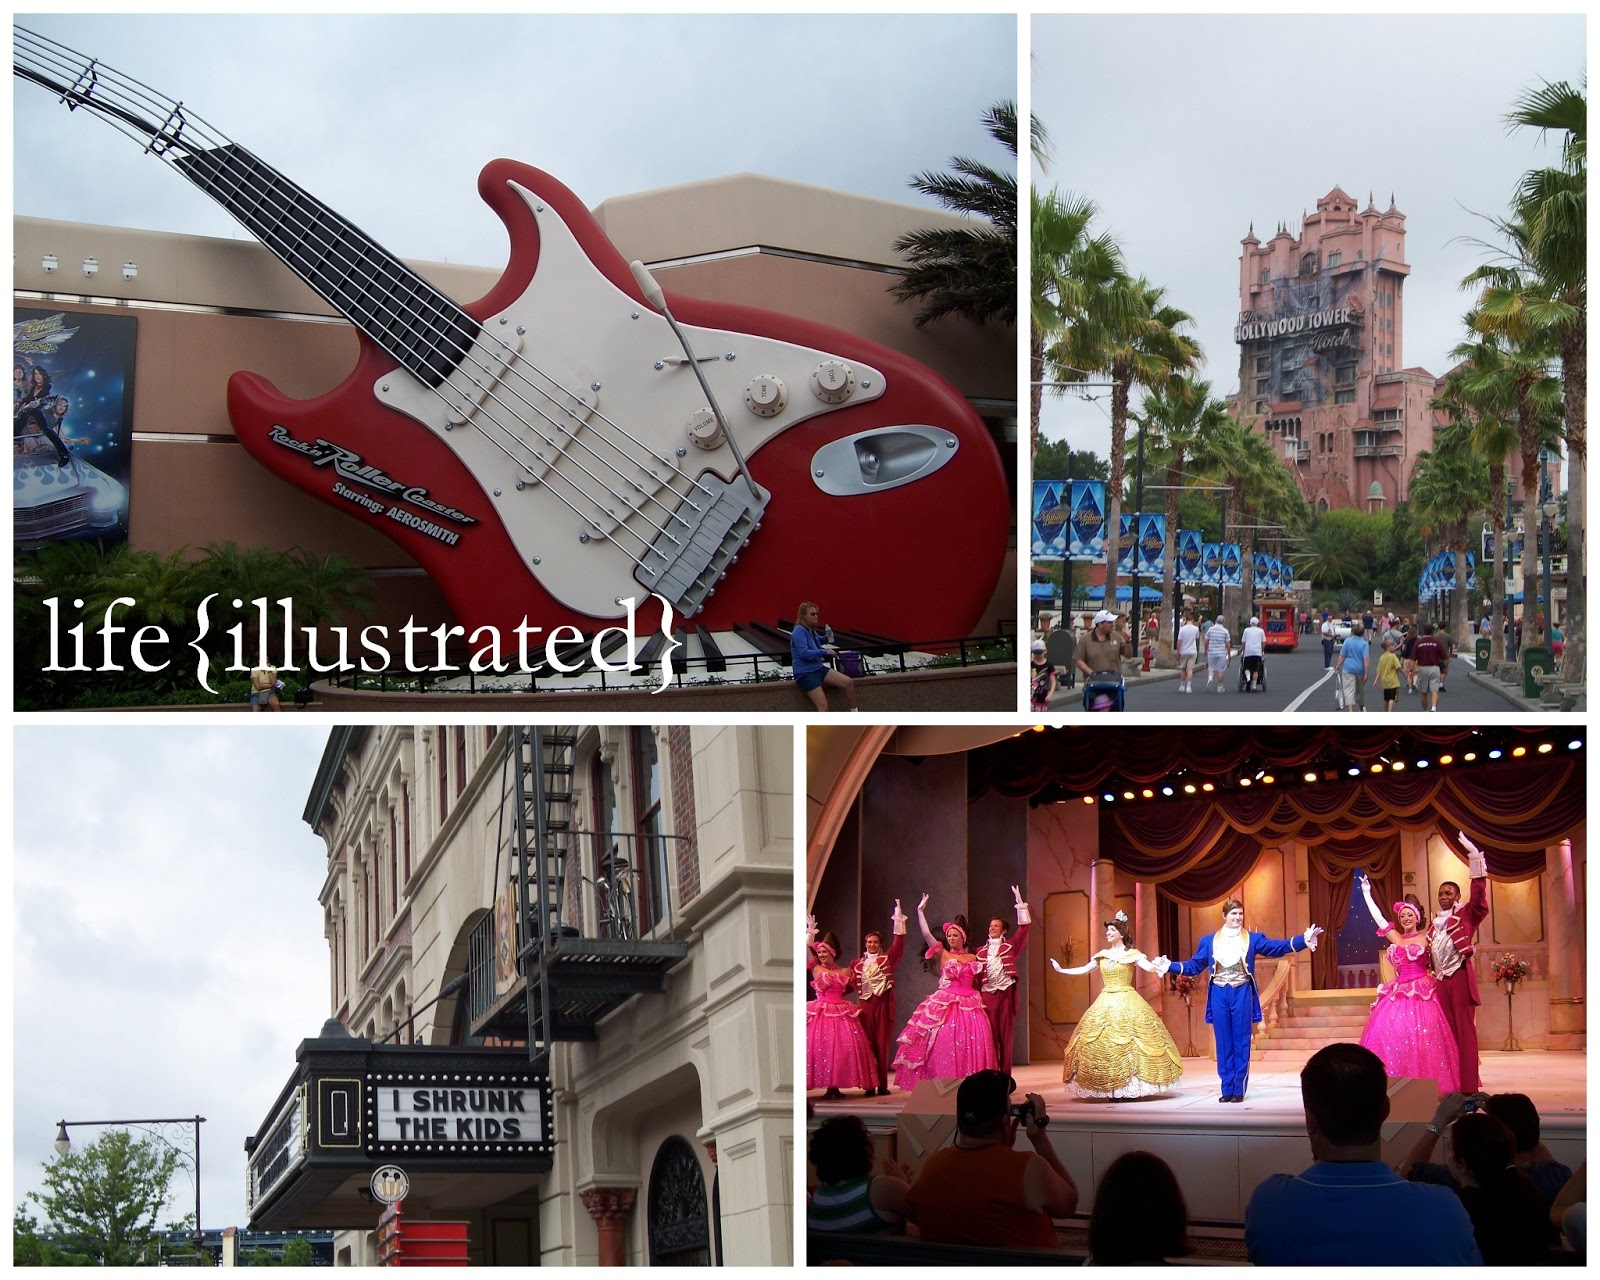
Hollywood Studios is SO much fun! It is home to the famed Tower of Terror, Rock'n'Roller Coaster, and many other exciting rides. There are several behind-the-scenes ride/tours you can go on and even a stunt show with real stunt drivers on motorcycles and in cars.


Animal Kingdom is the largest of the parks and, like Magic Kingdom, is divided into sections: Oasis, Camp Minnie-Mickey, Discovery Island, Dinoland U.S.A., Africa, and Asia. It's kind of like a zoo on steroids that also happens to have some thrill rides. The animals aren't caged, so to speak, but there are a lot of natural barriers. It feels like you're walking through the jungle with these creatures, but you're fully protected.


Disney World also has the attractions mentioned under Myth #1: water parks, golf, miniature golf, spas, a sports complex, a virtual reality park, and a huge shopping area.


Myth #4: "If there are four parks, then I can just go for four days and see it all."

These parks are huge, and even if there weren't any lines or other people to wait on, I doubt you could see everything in just four days. I've been there four times and still haven't seen everything! I heard somewhere that it would take fourteen days to see everything at Disney World. We can't afford to be gone for fourteen days, but we hope we'll be able to return in the future to see and do more.

It's a lot of information, but I could have written so much more! If there is a specific question you have that I didn't answer, please feel free to ask in the comment section below. Come back Monday for part two!

How to Plan the Perfect Trip to Disney World, Part Two: Money Talk
How to Plan the Perfect Trip to Disney World, Part Three: Where to Stay

Sharing at:
House of Hepworths
Tatertots & Jello
I Should Be Mopping the Floor
The Life of Jennifer Dawn

Mar 27, 2013

Quinoa Stuffed Peppers with Avocado Cream Sauce and Feta

As I've mentioned before, Marshall and I have made a lot of changes to our diets over the past year. We eat "real" food about 95% of the time and cheat on the other 5%. We are by no means experts in nutrition but are constantly doing research and tweaking our diets as we learn what's best for our bodies.

One of the new foods we've been enjoying lately is quinoa. I love this infographic showing quinoa's health benefits.

Health Benefits of Quinoa
{via}
Like rice, quinoa pretty much tastes like whatever you cook it with. If you've been putting off trying quinoa, find a rice dish you already enjoy, and substitute the rice for quinoa. One of our favorites is Quinoa Stuffed Peppers with Avocado Cream Sauce and Feta.


Quinoa Stuffed Peppers with Avocado Cream Sauce and Feta

1 C uncooked quinoa
2 C water
4 bell peppers, sliced in half with seeds and membranes removed
1 onion, chopped
1 T minced garlic
1 C black beans
2 roma tomatoes, chopped
4 T crumbled feta cheese

For the avocado cream sauce:
1 avocado, pitted and skin removed
1 T lime juice
1 T garlic powder
1 t sea salt

Preheat oven to 425 degrees. Lay peppers, cut side down, on a greased baking sheet. Bake for 25 minutes or until tender.

Meanwhile, bring quinoa and water to a boil. Cover, and let sit for 15 minutes or until the water is absorbed.

In a large pan, saute chopped onion until translucent. Add garlic, and cook for one minute longer. Turn off heat and add beans, tomatoes, and cooked quinoa. Mix well.

Mash or puree the avocado with the lime juice, garlic powder, and sea salt.

Spoon the quinoa mixture into the cooked peppers, and top with the avocado cream sauce and feta. These stuffed peppers are just as good leftover!


The avocado cream sauce is also wonderful over spaghetti with some chopped romas and a little parmesan! Who said healthy food couldn't taste good?!

Sharing at:
Savvy Southern Style
House of Hepworths
Tatertots & Jello

Mar 25, 2013

Small Entryway Reveal and a Free Printable

Hello, everyone! I've been writing less than usual as I'm determined to finish my spring cleaning this week. One project that needed to be tackled in the midst of my cleaning efforts was the small entryway to the house. Our house has three outside entrances. The front door opens into the living room, there is a door on the driveway side of the house that opens into the small entryway (and then a door from that into a big entryway), and then there is a door to the back porch that we never use. I'd say we get a pretty even amount of people who come to the front and side doors. Marshall and I almost exclusively use the side door.

The small entryway was pretty drab, and I thought it would be nice to spruce up the area we first see when we walk in the door. Here it is before:


We forgot to take a real "before" picture. This is after Marshall took down a couple of boards. You can see where the walls had been painted around them (definitely a pet peeve!).


And here is the entryway today:


This makeover was completely FREE as we used leftover paint (True Value's Encompass) and a shelf that had been previously destined for our garage sale.


I pulled a few things from around the house for the shelf. It will probably look completely different tomorrow. You know me.


I brought in the Christ is Risen printable and made a new printable for the other frame. I thought Micah 6:8 would be a great verse to see each time we leave the house.

{click to download}
A side-by-side for you:

It's a warmer welcome, for sure!

Sharing at:
Savvy Southern Style
House of Hepworths
Thrifty Decor Chic

Mar 20, 2013

Key Lime Cream Cupcakes with Vanilla Lime Buttercream

Stop whatever you're doing and make these cupcakes.

Seriously.

They are that amazing.


I adapted a recipe from Bakerella for the cupcakes and made up my own frosting to top them off.

Key Lime Cream Cupcakes
{click to print}

2 cups all purpose flour
1 1/2 cups sugar
3/4 teaspoon baking powder
1 teaspoon baking soda
1/2 teaspoon salt
3 eggs
2/3 cup coconut oil, melted
2/3 cup bottled lime juice
3/4 cup Greek yogurt


Preheat oven to 350 degrees.

Sift the flour, sugar, baking powder, baking soda, and salt together in a large bowl.

Add the eggs, oil, lime juice, and yogurt. Mix until well blended.

Pour into cupcake tins.

After putting the tins in the oven, turn the oven down to 325 degrees, and bake for 25 minutes.

Cool on wire racks.

Vanilla Lime Buttercream Frosting

1 C butter, softened
4 C powdered sugar
2 t vanilla extract
2 t bottled lime juice
green food coloring, optional

Cream the butter until smooth.

Add one cup of powdered sugar and mix well.

Mix in vanilla, lime juice, and food coloring.

Add remaining powdered sugar, one cup at a time.

Pipe onto cooled cupcakes.

Refrigerate leftovers... if you have any!


Sharing at:
Savvy Southern Style
House of Hepworths
Tatertots & Jello

Mar 16, 2013

Dining Room Update

We shared our newly painted dining room not long after we moved in, but we've made a lot of changes since then. At the time, we weren't sure what to do with some of our furniture, and it ended up in the dining room. Since then, we've finished all of the main rooms of the house, and those extra pieces that were being shuffled around have finally found a permanent spot. Well, as permanent as anything in our house ever is.

Marshall and I also agree that our spring decor is the best "look" for the dining room with the wood tones and paint color. It seemed like the perfect time to share some pictures!


{burlap table runner}

The biggest change is that we moved the mirrored dresser out of the corner by the window and moved the piano in.

{Goodwill Gallery Wall}
We finally hung some plates and bowls on the other side of the window. I love the bowl with the birds; it belonged to my great grandmother.


We hung the mirror-turned-chalkboard and have been writing Bible verses or quotes on it.


We'll be able to move the floor lamp to the office after we replace the fluorescent light above the table. We've been checking ReStore every time we go by, but nothing has caught our eye yet. Someday...


I had big plans for making curtains, but I think I'm going to just leave the windows alone. This room gets so much sunlight, and after living in a basement, we love how bright this room is!

Sharing at:
Tatertots & Jello
Thrifty Decor Chic

Mar 14, 2013

Backyard Plans

This is what our backyard looks like right now.


Sad.

But I have big plans for it! The first things to go will be the satellite dish and clothesline. We'll put up a "real" clothesline in a spot that won't take up the middle of the yard.

The small window on the left side of the picture is where the dining room is located. We want to make a pergola to stand on either side of the little concrete patio and just over the top of the window. We'd like to plant some wisteria to vine up the side and over the top of the pergola. We'll be able to enjoy it not just from the yard, but also from the dining room window.

The bank of windows to the right is where the kitchen porch is located. I'd like to put a lilac bush somewhere along the back of the house where it can be seen from those windows. I adore boxwood, so I'll add a few bushes in there somewhere. I'm still working on picking out some flowers to plant in the spaces.

We're also trying to think of some ways to create privacy between our house and the neighbor's house. There isn't much distance between the two. Marshall and I love eating outside when the weather is nice, and dinner with the neighbors, no matter how wonderful they may be, just isn't romantic.

My inspiration board:


Dreaming up a garden is whole lot more fun than planting one! Are you dreaming, too?

Sharing at:
House of Hepworths
Tatertots & Jello

Mar 13, 2013

Waterproof Drawstring Backpack

We are planning a trip to Disney World (more on that later), and something that I always take when I go is a drawstring backpack. They're lightweight enough to wear all day, and they can hold quite a bit. The only problem is that I haven't found any that are waterproof. I usually end up taking a whole bunch of ziploc bags to keep my camera, phone, etc. safe on water rides, but it can be a bit of hassle having everything stuffed in ziploc bags and then stuffed into a larger bag.

I thought I'd look online for some kind of a wet bag that could be worn as a backpack but didn't find anything that was quite right. So, I decided to make my own!

You know how some people cook a fabulous meal and when asked for the recipe, their response is that they just threw a bunch of stuff together? I not only do that when I cook, but I also do it when I sew. I'm kind of a "cut and paste" kind of girl, and that's probably partially because I just taught myself to sew over time. It doesn't lend itself to very thorough tutorials, so consider this as more of an if-I-can-do-it-you-can-too post.


Here is my sketch of bag measurements that I used while I was planning and constructing.


I bought this napkin at Target almost a year ago and had no idea what I would do with it. It was on clearance for about a dollar, and it was just too cute to pass up. It's 18 inches square, and I thought it would be the perfect size for a backpack. I ripped out the top seam (and tag) and opened the napkin so it could be used as the outer part of the bag.

I ordered some PLU (waterproof fabric) online for the inner lining. PLU can be a little tricky to work with. The fabric side is slippery, the shiny side is sticky, it can't be ironed or put in the dryer, and you aren't supposed to pin it (pin holes allow water in). Since I hadn't used PLU before, I practiced sewing on a small piece before tackling the bag.

A drawstring enclosure isn't very water tight by itself, so I added a zipper at the top of the bag. The bag wouldn't cinch up very well if the zipper was right at the top, so I placed the zipper about five inches below the top of the bag.


Since there isn't any point in waterproofing the bag above the zipper, I just used cotton for the top part.


I added a waterproof interior pocket to the bag for things like cell phones and room keys.


Nylon parachute cord worked well for the drawstrings. You'll need about 60 inches of cord for each side, and you can see in my sketch how I strung the cord through the casing. If you string it through the casing and loop it around each side, you will create "straps" when you pull the string to close the bag. Does that make sense?

I opened about an inch of the side seams at the bottom of the napkin to insert the cord. I sewed over the cord, backtracking several times to secure it well.

I should have tried on my bag before I sewed the cord in; the straps are perfect for Marshall but a little bit long for me. I tied the excess into a bow at the bottom, and I think it's actually kind of cute!


The bag is just the right size for an adult, and I think it will make life much easier if we can just toss things into the bag and go. I can't wait to test it out!


Functional and CUTE!

Sharing at:
Savvy Southern Style
Gingersnap Crafts
Skip to My Lous
House of Hepworths
Tatertots & Jello

Mar 11, 2013

Almost Over

Winter is hanging on a little late this year, but it's almost over! The older I get, the more I realize how quickly time flies. I'm trying not to wish the time away, so this is me trying to be more "in the moment."


Mar 7, 2013

Soaked Whole Wheat Bread

For the past year, we have been trying to feed our bodies the best possible food that we can. It began with some health concerns that we wanted to solve at home, and I started doing a lot of research to see what we could do to eat better food. We were primarily needing to rid our diets of high fructose corn syrup, and I am still amazed by how many products contain it! There were the obvious things, like bottled and fountain drinks, but then we found it in a lot of condiments and even in our favorite whole wheat bread.

One search led to another, and I discovered that our beloved store bought bread also contained bleached flour, quite a bit of sodium, and a lot of ingredients that I couldn't pronounce. Not only were the ingredients all wrong, but unless the grains that are in the bread are sprouted or soaked, your body can't even absorb the good stuff in it!

I looked all over for bread made with sprouted grains, and all I could find was Ezekiel bread. It's too pricey for our budget and isn't sold in any stores close to home, so I resorted to making my own. I found a great recipe from Shaye at The Elliott Homestead and have adapted it just a bit. It is SO good that I just had to pass it along to you.

This recipe makes three loaves at a time and freezes wonderfully. With only two of us, I usually just make bread once a month. I love being able to do the work all at once and then enjoy the fruits of my labor for a few weeks.


Soaked Whole Wheat Bread
{click to print}

11 C white whole wheat flour
2 C old fashioned oats
3/4 C butter, melted
1 C honey
3 3/4 C warm water
1/4 C apple cider vinegar
--
1/2 C warm water (about 100* F)
1 t honey
2 1/2 T active dry yeast
--
3 T vital wheat gluten
1 1/2 T sea salt

Step 1: In a large bowl, stir together the flour and oats. Make a well in the center.
Step 2: In a medium bowl, mix the butter, honey, water, and vinegar.
Step 3: Pour the liquid into the well in the flour/oat mixture.
Step 4: Stir with a wooden spoon until well combined.
Step 5: Cover the bowl with plastic wrap, and lay a wet towel over the top. Let sit at room temperature for 12-24 hours.
Step 6: After 12-24 hours, proof your yeast. Stir it in to the dough. You may have to ditch the spoon and go at it like you are mashing up hamburgers.
Step 7: Add the gluten and salt. Mix well.
Step 8: Turn dough out onto a lightly floured surface and knead for 8-10 minutes. Resist the urge to add extra flour unless you absolutely must. The longer you knead, the smoother the dough will become.
Step 9: Place the dough in a greased bowl. Cover with a towel, and allow to rise until doubled in size (about one hour).
Step 10: When dough has doubled, punch it down, rotate it, and cover with a towel. Let it rise until doubled again (about thirty minutes).
Step 11: When dough has doubled, divide it into three even portions. Shape them into loaves, and set them in greased loaf pans. Cover with a towel, and allow to rise. Preheat your oven to 350* F.
Step 12: Bake loaves for 45-55 minutes, or until they sound hollow when tapped. Cool on wire racks.


Unlike many homemade breads, it can be sliced thinly!


Sharing at:
Savvy Southern Style
House of Hepworths
Tatertots & Jello