Showing posts with label Seasonal Decor. Show all posts

Dec 11, 2013

Christmas Home Tour

No matter where we've lived, I have always enjoyed decorating our home for Christmas. This house, though, seems like it was made for Christmas! It makes it even more fun! I used a lot of the same decor as I had up last year (even the same tablescape- gasp!) but moved a lot of things to different parts of the house or paired them up in a new way. Enjoy the tour!


The front porch...


As usual, we cut down a really huge tree and then had to chop a lot of the bottom to fit it in the house. It was okay, though, because I had plenty of branches for making a wreath, a garland, and sprigs to tuck here and there. The ornament in the bottom right picture is the one we picked out on our Christmas date.


So much better than a fake garland! I might do this every year. The vase with branches is a card tree. We have a few up now!


Of course, I had to make new stockings this year. These were made out of old plaid shirts I picked up at Goodwill. Yes; I'm still obsessing over plaid. I did not come up with the chalkboard graphic on my own. I'm just really good at copying stuff I see on pinterest. The advent garland is still a favorite!


I didn't have the gallery wall up in time for Christmas last year, so I was excited to switch out the sheet music for some Christmas pieces.

That's it! Thanks for stopping by!

Dec 7, 2013

FREE Christmas Printables

Hello again! I've made some Christmas printables for myself and wanted to share them with you. They are lyrics taken from Silent Night, Holy Night, and It Came Upon the Midnight Clear. Enjoy!


Mar 4, 2013

No-Sew Vintage Seed Packet Garland


Here is a project that is sure to lighten your spirits on the dreariest of winter days! It worked for me, anyway. This seed packet garland is super easy, so I thought a photo tutorial would be fun. Enjoy!


Dec 17, 2012

Vintage Advent Garland


I know, I know...

It's super late to be posting an Advent garland idea.  I had started a different Advent calendar at the beginning of the month but didn't really love it.  And then I saw this idea on pinterest.

By the way, you know how there is usually a list of the most popular words or phrases of the year towards the ends of December?  I think the phrase "I saw it on pinterest" will be pretty high on the list.

Anyway, when I came across Miss Mustard Seed's vintage Advent garland, I immediately made plans to make one of my own.  I thought to myself, "Oh, this looks super easy!  And fun!"


Wrong.

Have you ever tried to print on fabric?  Yes, I followed the instructions, and yes I tried everything I could think of to get it to go through the printer, and it just wouldn't.  I tried troubleshooting via Google search, but that got me nowhere.  Apparently, I am the only one who has problems printing on fabric.  I was so frustrated that I almost posted something on my Facebook status about it, but I kept thinking of Proverbs 20:11.

Instead, I smacked the printer and started baking something in the kitchen.

I came back a few hours later with some much thinner fabric, and it went right through the printer.


And the rest of the project was super easy and fun.


In a nutshell, you just download vintage graphics (all mine came from The Graphics Fairy), crop and resize them to 3 1/2 x 5 inches, and add numbers in the corners.  Print them on fabric.

How do you print on fabric?

Just cut down a piece of freezer paper and your fabric to 8 1/2 x 11 inches.  Iron the waxy side of the freezer paper to the back of the fabric (to make it stable enough to feed through the printer).  Put your fabric in the printer so the images will print on the fabric side.

I printed four images per page and cut them out.  I cut the heavier fabric (the stuff that wouldn't fit through the printer) for the backs of the pockets.

After sandwiching the ribbons in between the pocket pieces, sew around the sides and bottom to create the pocket.

Fill the pockets with goodies or slips of paper with Advent activities written on them for your family to enjoy.  You can begin the Advent season with a full garland and untie a pocket each day, or you can start with one pocket and add to the garland throughout the month.  We are going to leave our garland up all season.  It's just too pretty to take down!


Be sure to check here for the full instructions!

Want to make our Christmas merry?  Subscribe to our blog and follow us on pinterest!


Sep 20, 2012

Thimbleberries "Woodland Stars"

Here is my latest sewing project for BF:


It's based on the Thimbleberries pattern "Woodland Stars."


Out of all the winter fabrics they picked for this wall quilt, I think my favorite is the gold.  The quilt will be on display in the store, and you can stop in to take a closer look.  Wednesday was the first day of the Fall Shop Hop, so you may also find some pretty good deals if you head in this week!

Sep 18, 2012

Autumn Tablescape

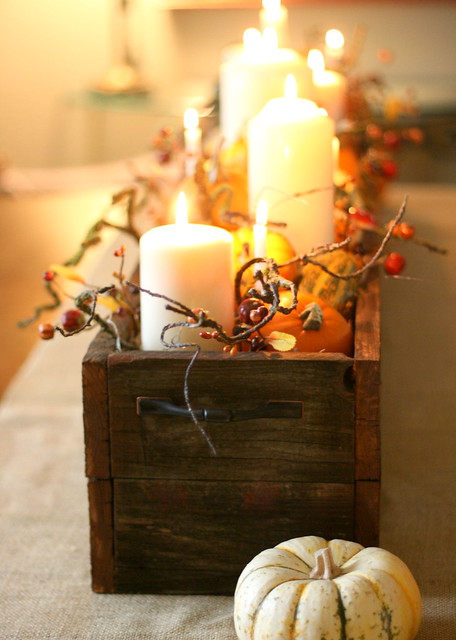
I've been looking forward to today's post as this centerpiece is probably my favorite thing in our home right now.  Marshall came home with a couple of old, beaten up drawers a couple of months ago thinking that I could use them somehow.  I knew they had potential but wasn't sure what to do with them.  And then I saw this:
Centerpiece
{via}
I have tons of candles left over from our wedding and an autumn garland that never looked right anywhere.  Put them together with some artificial leaves, pine cones, and corn and...


Click here for my DIY Burlap Table Runner post.


The Lettered Cottage

Sep 17, 2012

Burlap Table Runner and a Treat for YOU!

For a while there, I was really into place mats.  I still like the look of them, but they just don't get very clean.  It also seems kind of silly to buy enough place mats to fill the table up when there are only two of us eating at it.  Enter: the table runner.  It's proven to be a much better option for us, and I love the look of it.  For Autumn, I thought I'd try my hand at a burlap runner and thought I'd share it with you, too.  This is another easy project that shouldn't take more than an hour or two.


You will need:

-several yards of burlap (depending on the length of your table)

-3/4 yard off-white fabric (I chose one with a linen look)


Start by measuring the length of your table and determining how large you'd like for your runner to be.  When you have decided on the dimensions, lay the burlap out flat on the floor and note where you need to cut.  Slowly and carefully pull one thread all the way out to make your cutting line clear.  This will help you to cut it in a straight line.


I ended up pulling out about 5 strands on both of the lengthwise edges so that both sides would have a frayed look.


Cut down the middle of the space.


Cut two 42 x 12 inch strips from your white fabric.  Fold over one long edge and both short edges 1/4 inch, press, and repeat with opposite sides.


With right sides together, pin the long, unhemmed side of one of your white pieces to the bottom, short edge of your runner.  The easiest way I found to do this was to pin the edges first and then make pleats from the outer edges to the middle.


My pleats were 2 inches wide and over lapped by one inch.  This created four pleats on each side of the runner.


Sew the pieces together with 1/4 inch seam allowance.  Press the pleats down, and sew 1/4 inch seam along the top edge.  Repeat with the other edge.


Want a more sophisticated runner?  No problem!  Fold the long edges of the runner over a 1/2 inch, press, fold another 1/2 inch, and press again.  Stitch along the hem with a 3/8 inch seam.  Shorten the ruffle to your desired length.


And for your treat...  The Ben Franklin in Chariton, IA has graciously agreed to give a 20% discount on burlap purchases of 1/2 yard or more to life {illustrated} readers (in store only)!   The discount will run 09.17-09.25.2012.  Hurry in to get your burlap!

Past Burlap Posts:


Linking up at:
Skip To My Lou