Showing posts with label Home. Show all posts

Dec 11, 2013

Christmas Home Tour

No matter where we've lived, I have always enjoyed decorating our home for Christmas. This house, though, seems like it was made for Christmas! It makes it even more fun! I used a lot of the same decor as I had up last year (even the same tablescape- gasp!) but moved a lot of things to different parts of the house or paired them up in a new way. Enjoy the tour!


The front porch...


As usual, we cut down a really huge tree and then had to chop a lot of the bottom to fit it in the house. It was okay, though, because I had plenty of branches for making a wreath, a garland, and sprigs to tuck here and there. The ornament in the bottom right picture is the one we picked out on our Christmas date.


So much better than a fake garland! I might do this every year. The vase with branches is a card tree. We have a few up now!


Of course, I had to make new stockings this year. These were made out of old plaid shirts I picked up at Goodwill. Yes; I'm still obsessing over plaid. I did not come up with the chalkboard graphic on my own. I'm just really good at copying stuff I see on pinterest. The advent garland is still a favorite!


I didn't have the gallery wall up in time for Christmas last year, so I was excited to switch out the sheet music for some Christmas pieces.

That's it! Thanks for stopping by!

Oct 14, 2013

Kitchen Cabinet Update

Today, I thought I'd take a little time to share an update on how our kitchen cabinets have held up. Our kitchen reveal post has received a lot of attention over the past year (thanks, pinterest!) mainly due to the fact that we painted our kitchen cabinets without sanding them.

Sanding must be a universally hated task. It sure is in our home! But if you're going to go to all the work of painting something, you definitely want to do whatever you need to do so that you don't have to redo it later, even if that means sanding.

I'll admit I was a bit skeptical when we painted our cabinets without sanding them.

But it worked!

We used a primer that did not require any sanding and a higher quality paint than what we'd normally use on walls (more details here). Not only did the cabinets look great as soon as they were finished, but they look terrific a year later!

There are just a couple of spots around the knobs of the two cabinets we use most often that need a little touch-up, but other than that, the paint has held up very well.

One thing I hadn't considered was how often I would have to wipe down the cabinets. For pete's sake, it looks like we splash coffee on them every time we walk by. I guess that's what I get for going with white. I love how bright they are, though, so I'd still pick white even after knowing I'd have to clean them all the time.

In the end, I'd say it was a success! If you've been on the fence about painting your cabinets, GO FOR IT!

If you have a success story about painting your cabinets, I'd love to hear all about it!

Jul 6, 2013

Front Yard Changes

We have absolutely loved having a space of our "own!" It worked out well that we moved in during the colder months and had plenty of time to do some interior work. Now that the weather is nicer, we've moved the work outdoors, starting with the front yard.

We didn't really change what was already here, but we added some plants and switched up the flower garden a bit.

The big picture:

They don't look like much now, but we planted two pear trees on either side of the yard. You need two to pollinate, so we planted a Bartlett and a Kieffer. They should produce a small amount of fruit this year, a medium size next year, and then the average amount from the third year on. All the rain we've had this year has been great for growing trees!

Since the trees did so well, we also planted a couple of Double Knock Out Roses. We want to eventually have a hedge across the front of the yard, so we're planning to add a couple of bushes each year. The blooms are gorgeous!


The flower beds were full of different types of hostas, but the draught finished off half of them last year, and I accidentally killed the rest. I planted Lily of the Valley- you know, the flower that even the blackest thumb can grow. Well, it didn't grow, so I ended up putting in some Impatiens. You can't see it yet, but there is some Astilbe and Caladium coming up behind the Impatiens.


We put planters on either side of the stairs with Bleeding Heart and some more Impatiens.


And, of course, no porch is complete without Boston ferns!


I am reusing my wreath from last summer, but I had to take everything off the foam form and use a straw form. After hanging all summer, the wreath was sagging. I'm hoping the straw form will hold up under the weight of the shells. I tied it off with a wire-edged burlap ribbon I found here.


The backyard is almost finished, and we'll show that next!

Mar 25, 2013

Small Entryway Reveal and a Free Printable

Hello, everyone! I've been writing less than usual as I'm determined to finish my spring cleaning this week. One project that needed to be tackled in the midst of my cleaning efforts was the small entryway to the house. Our house has three outside entrances. The front door opens into the living room, there is a door on the driveway side of the house that opens into the small entryway (and then a door from that into a big entryway), and then there is a door to the back porch that we never use. I'd say we get a pretty even amount of people who come to the front and side doors. Marshall and I almost exclusively use the side door.

The small entryway was pretty drab, and I thought it would be nice to spruce up the area we first see when we walk in the door. Here it is before:


We forgot to take a real "before" picture. This is after Marshall took down a couple of boards. You can see where the walls had been painted around them (definitely a pet peeve!).


And here is the entryway today:


This makeover was completely FREE as we used leftover paint (True Value's Encompass) and a shelf that had been previously destined for our garage sale.


I pulled a few things from around the house for the shelf. It will probably look completely different tomorrow. You know me.


I brought in the Christ is Risen printable and made a new printable for the other frame. I thought Micah 6:8 would be a great verse to see each time we leave the house.

{click to download}
A side-by-side for you:

It's a warmer welcome, for sure!

Sharing at:
Savvy Southern Style
House of Hepworths
Thrifty Decor Chic

Mar 14, 2013

Backyard Plans

This is what our backyard looks like right now.


Sad.

But I have big plans for it! The first things to go will be the satellite dish and clothesline. We'll put up a "real" clothesline in a spot that won't take up the middle of the yard.

The small window on the left side of the picture is where the dining room is located. We want to make a pergola to stand on either side of the little concrete patio and just over the top of the window. We'd like to plant some wisteria to vine up the side and over the top of the pergola. We'll be able to enjoy it not just from the yard, but also from the dining room window.

The bank of windows to the right is where the kitchen porch is located. I'd like to put a lilac bush somewhere along the back of the house where it can be seen from those windows. I adore boxwood, so I'll add a few bushes in there somewhere. I'm still working on picking out some flowers to plant in the spaces.

We're also trying to think of some ways to create privacy between our house and the neighbor's house. There isn't much distance between the two. Marshall and I love eating outside when the weather is nice, and dinner with the neighbors, no matter how wonderful they may be, just isn't romantic.

My inspiration board:


Dreaming up a garden is whole lot more fun than planting one! Are you dreaming, too?

Sharing at:
House of Hepworths
Tatertots & Jello

Feb 21, 2013

Reading Nook Reveal

Two room reveals in one week- I'm feeling super productive! I've been dreaming of spring for a couple of weeks, and I realized that once it finally gets here, we probably won't make a whole lot of indoor progress. I thought I'd take advantage of being cooped up to finish off some of our smaller projects.

The reading nook is something that Marshall and I have both been really excited about. We enjoy reading and really wanted a place where we could go and not be distracted by phone calls, computers, housework, etc.

Our house has four bedrooms on the upper level, and we only use one. One of the bedrooms has a room off of it that is either meant to be a really huge closet or a small bedroom. Either way, it was the perfect space for our reading nook.

The room was pretty rough to start out.


The walls and ceiling were painted pale blue, but the ceiling had been patched up several times and not been repainted.


There were several wooden racks on the walls, but most of the hooks were broken off. Marshall removed all of the racks before we painted.

Before we started picking out colors and themes, we needed some furniture. We found the perfect chair and a bookshelf in the most unlikely of places for a whopping total of $17.


The chair smelled like smoke, and the cushions were in bad shape. After a little bit of work, though, it turned out nicely. And it's super comfy, too!


At first I thought I'd just recover the seat cushion and not bother with the skirt, but the chair really needed it to hide the rocker/swivel mechanism.

The bookshelf is the perfect size for the space. We had talked about painting it, but I really like the wood tones in the room. We can always change it later if we want to.


And what you've been waiting for...


We used up the rest of our Carriage Ride paint (leftover from the dining room, bedroom, and bathroom) on the walls and painted the ceiling white.

I love the color of the wood floors, but they were pretty beat up. We bought this rug for $20 at Aldi last year, and it fits the space well.

We couldn't forget about our nieces, nephews, and little friends!


I love this picture I picked up at Goodwill.


There is only one heating vent to the upstairs, and it's under our bedroom door. A cozy blanket is a must!


We're still looking for another chair to put in the reading nook. Maybe we'll find one that doesn't need any work...

This reveal wouldn't be complete without a side-by-side, so here you go:


Bring on the blizzard! I've got a cozy place where I can curl up with a good book!

Sharing at:
House of Hepworths
Savvy Southern Style
Miss Mustard Seed
Tatertots & Jello
Thrifty Decor Chick

Feb 18, 2013

Bathroom Reveal

The bathroom reveal has been a long time in coming. I started the bathroom makeover before Thanksgiving with the intention of finishing it before our Christmas open house.

It probably would have gone quickly if I hadn't bumped the hose that connects the toilet to the water supply and flooded the bathroom.

It wasn't my brightest moment.

There is a lot of pressure behind that water supply.

No worries. My father-in-law came to the rescue before the whole house went under. The bathroom is dry, and the toilet is once again in working order.

Almost three months later, I finally got motivated to get back in there and finish painting. And I'm so glad I did.

Here are some before shots.
Problem #1: The trim around the doors has been painted white, and the baseboards were two different shades of stain.


Problem #2: The counter is gray, there is white tile on the wall to the left of the sink, and then there is this gray/white/brown marble-ish paneling behind the toilet.

Problem #3: All of the walls had been painted brown except for the wall above the toilet.


Problem #4: There were towel racks and hooks all over the place.


It seemed like four separate problems, but really, it was just one: the bathroom had been patched up so many times that there wasn't a common theme.

Our goal was to create one color scheme throughout the bathroom. Keep in mind that we don't own the house, so we couldn't remove tile, paneling, flooring, etc.

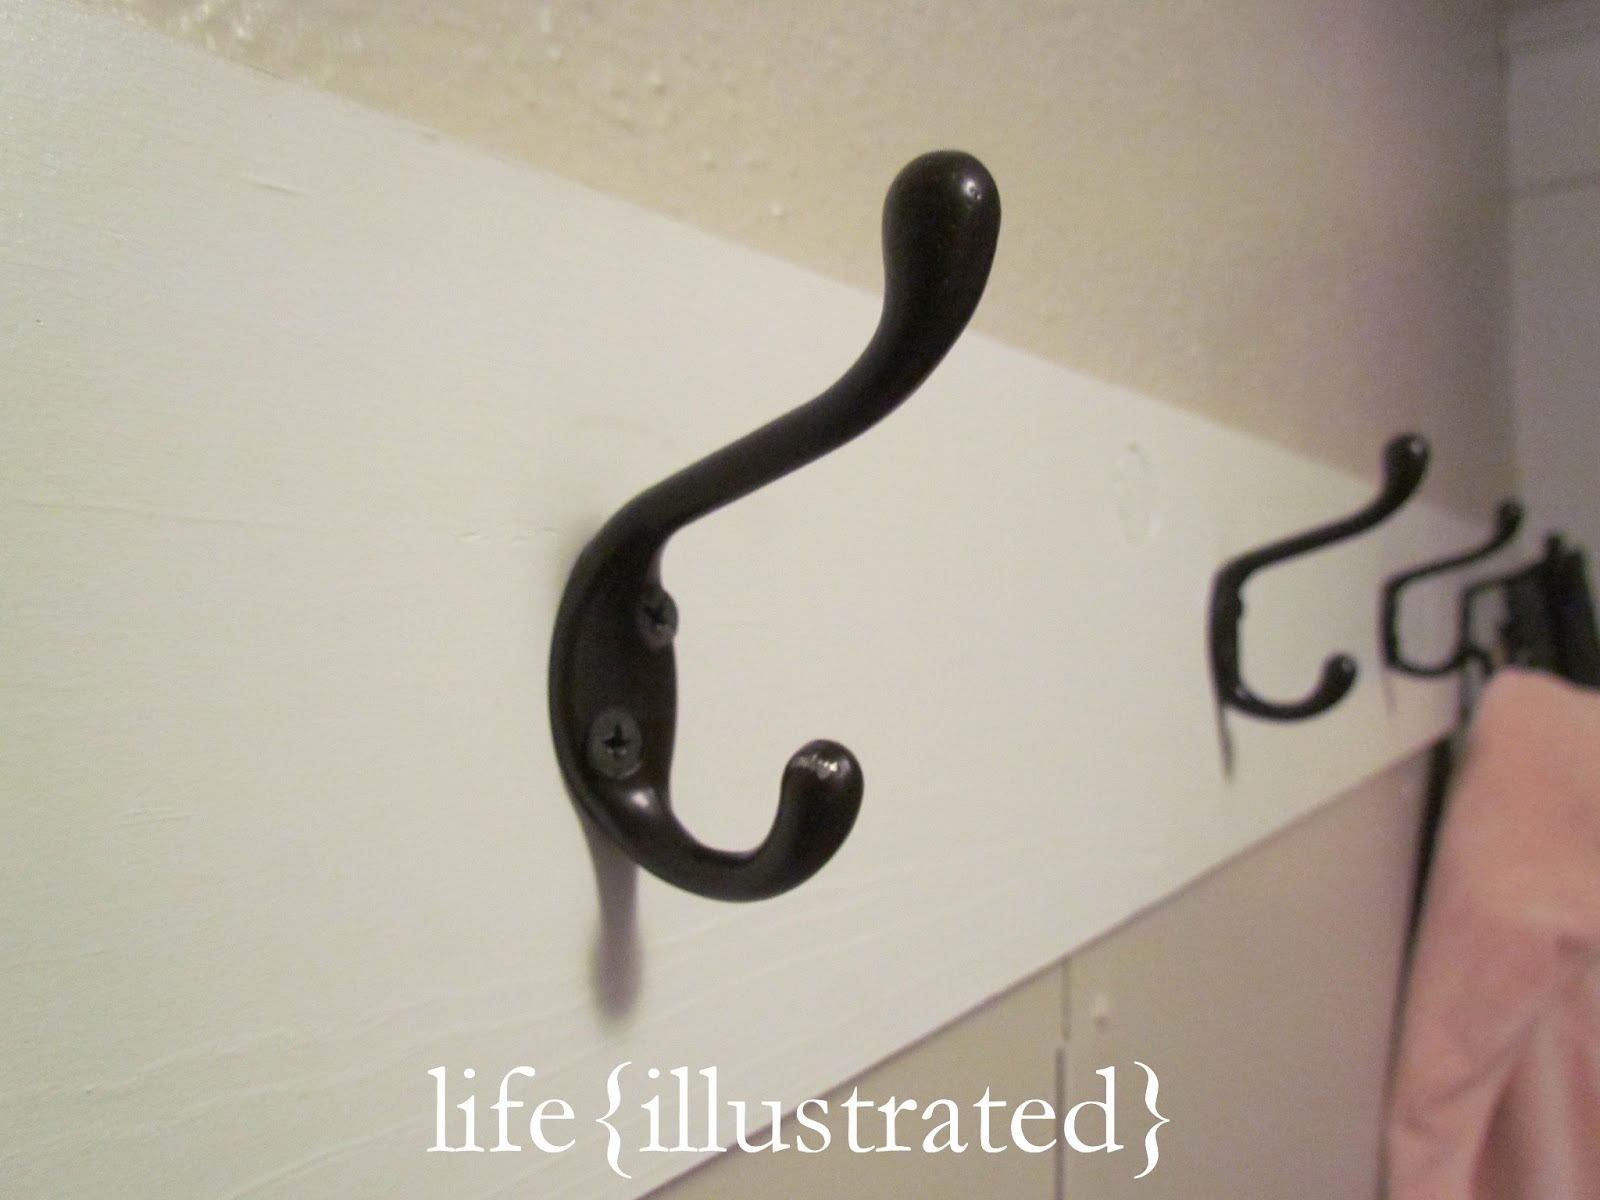
We started by taking down all of the towel bars and hooks. We replaced them with one board that has five matching hooks on it.


We used one of the bars we had taken down and put it up by the sink for a hand towel. We could have purchased a new towel bar that looked nicer, but this one still works.


The vanity drawers and doors didn't have any hardware on them, so we added some knobs that were left over from the kitchen makeover.

I would have loved to rip out the weird mirror storage thing and the light fixture above the sink, but once again, we don't own the house.

We painted the walls Carriage Ride by True Value, which is the same color we used in the dining room and master bedroom. The bathroom doesn't get much natural lighting, so it's hard to tell the exact color. Here is the color swatch from True Value's site.


Before painting over the paneling, we primed it with our favorite Zinsser 1-2-3 Cover Stain primer.


Yes, that is a Goodwill bag in the trash can. Just keeping it real.


We painted the baseboards white to match the trim on the doors.


I bought this shower curtain at Target last summer. I still love it!


The last change we made was to cover the window with frosting spray. It allows us to let in the small amount of light we do get while maintaining our privacy.

The bathroom is a long, narrow room. Combine that with the lack of daylight, and the pictures don't do it justice! You may not be able to tell much of a difference by the before and after pictures, but we are really enjoying the finished product. Having one central theme really makes the space feel clean and crisp- just as bathroom should be!

Sharing at:
Savvy Southern Style
House of Hepworths
Tatertots & Jello